On October 6th 2010, two friends launched a social media platform to be used specifically for uploading beautiful photographs and sharing them with friends, and so Instagram was born. Instagram, derived from a combination of the words ‘instant camera’ and ‘telegram’, now has an astronomical 300 million active users, with 75 million using the site every single day. It has long surpassed social media giant Twitter who lags behind with just 288 million active users (pfft!), and is available in 25 languages across the globe. Instagram users love the site so much that they spend, on average, 257 hours per month on the site (which is pretty impressive considering they are pretty much just browsing through photos!).
After looking at statistics like these, it would be difficult for any small business owner to think of a reason not to join Instagram! This beginner’s manual will guide you through the ins and outs of creating an Instagram business account, as well as providing you with some useful hints and tips to make sure that you get the best out of your Insta-perience (did that work? I’m just going to leave it in regardless…).
Anyway, without further ado, here is the ultimate guide to running an Instagram account for business! (Beginner’s edition).
1. Setting up your account
You can download the Instagram app for free from the Apple App Store (or ‘Google Play Store’ if you are one of those Android users).
With Instagram, like any other social media platform, you have to set up an account in order to use it. Even if you already have a personal Instagram account (and if you do you will already know quite a lot of what is in this beginner’s guide already), it is strongly advisable to open a separate account purely for your business. Not only will this avoid customer confusion, it will also reduce any chances of personal photos affecting your brand’s image (which, believe me, is more common than you think).
When choosing your username, simplicity is key. Avoid the temptation to create a crazy username (save this for your personal account), and simply go with your company name. So, if your company is called ‘Susan’s Florist’, your username should be ‘susansflorist’. If, for whatever reason, that username has been taken, try different but still professional variations. In this instance; ‘susansfloristuk’, ‘susans_florist and ‘susansfloristmcr’ (or another location abbreviation) would all be suitable alternatives. It’s just so that your customers will be able to find your company quickly and easily. If you have a company Twitter account, it is a good idea to have your Instagram username the same as your Twitter handle.
Adding your company profile picture & bio
Once you have created your account you will be prompted to add a profile picture and description, or ‘bio’, to your profile. Once you have written your company bio, it’s time to upload a profile picture. As is the case with other social media platforms, this is really important as it is no secret that users with a profile photo get up to ten times more engagement than those without one. When choosing your profile picture, avoid a selfie of yourself (again, this should be saved for your personal account). Instead, have a photograph of something relevant to your business (so if you are a florist, a photo of your nicest bouquet should do the trick!) or even your company logo.
The temptation may be to just whack in your company website address and have done with it which, in fairness, would be a lot easier and less hassle than thinking of a short and snappy way to capture your brand’s message. It would also more than likely fail to capture the interest of the nice folk that view your page. Your company bio is the first thing that Instagram users are going to notice when they tap onto your profile, and they want to see that you have put some thought into how you welcome them to your brand!
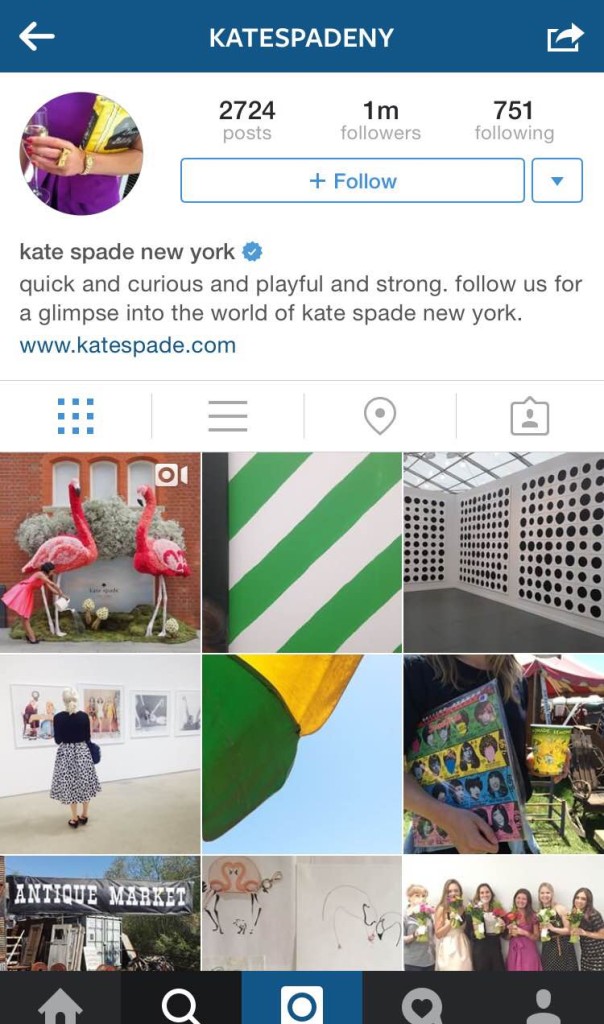
So, what makes a good Instagram bio? First and foremost, you want to make sure that it captures your company’s culture and ethics. This might seem like a bit of a pipe dream considering you only have 150 characters to make your mark. Don’t despair, however, just look at these fabulous bios from designer Kate Spade and insanely popular sports brand Adidas Originals:
Try not to think of the 150 character limit as a negative, and start to think of it as your friend, a friend that allows you to keep your introduction clear and to the point, and stops you from waffling on. Instagram is about having fun and giving your followers an insight into what life is like in the world of your brand. Don’t be afraid to let your followers know that, if they follow you, they will have the inside scoop on what goes on behind the scenes and might even grab some special offers as they browse your photos!
2. Taking & uploading your first photos
Okay, so now for the fun part! The reason that you have decided to join Instagram in the first place; taking some snaps! But the pressure mounts when you start to think about what you type of photograph you should upload first. Well, the rules are, there are no rules (just keep it clean!), so the Instagram world really is your oyster with this one. However, if you want to come out on top, here are some tips to help you along the way to Instagram greatness!
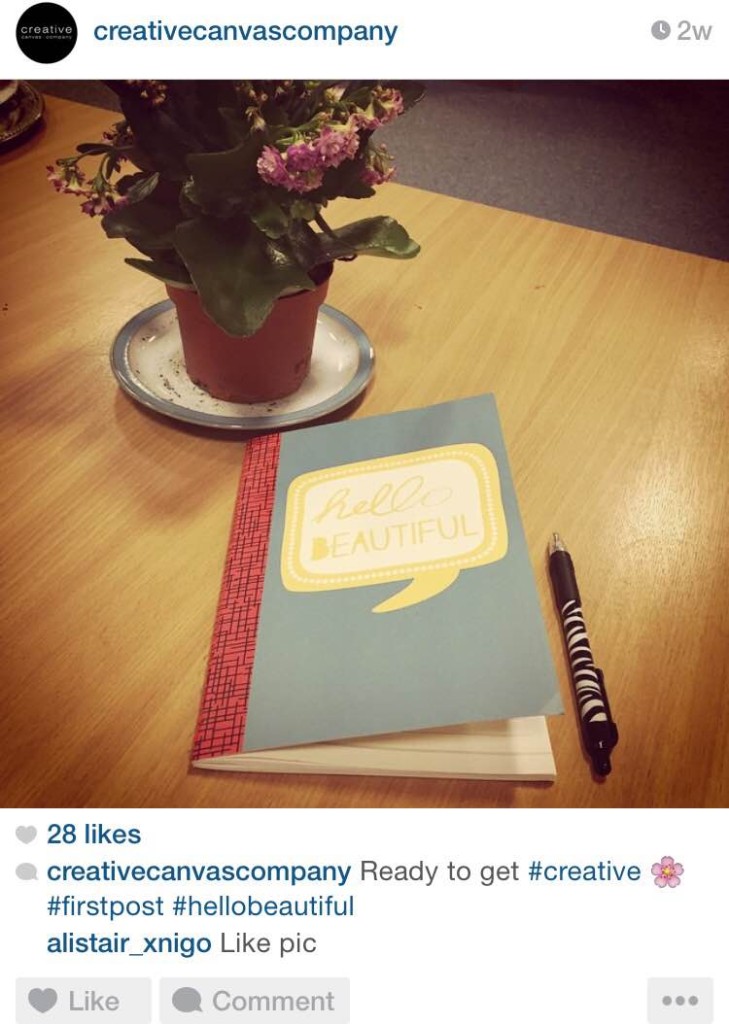
Avoid the hard sell. Nobody wants to engage with a brand that is continuously bombarding its followers with boring imagery of its products. Don’t get me wrong, uploading photographs of products is fine every now and again, as long as they are photographed in an artistic way. However, for your first post, try to stick to something a little bit more imaginative.
Keep it relevant. It is important for your first photo upload to be creative, but it is equally important for it to be relevant. If you run a small boutique clothing store and your first Instagram post is of your Yorkshire terrier asleep in front of your fireplace, you run the risk of confusing your viewers. Instead, try posting a photo of said dog looking cute inside your shop. That way, you remain true to your brand, whilst also taking advantage of the cuteness factor! (Always a sure fire winner with Instagram users).
Give users an idea of what is to come. Even if it is just inkling that you have lots more photos in the pipeline, or that your creative juices are flowing, it is always a good idea to post a picture that holds a promise of what to expect from your Instagram.
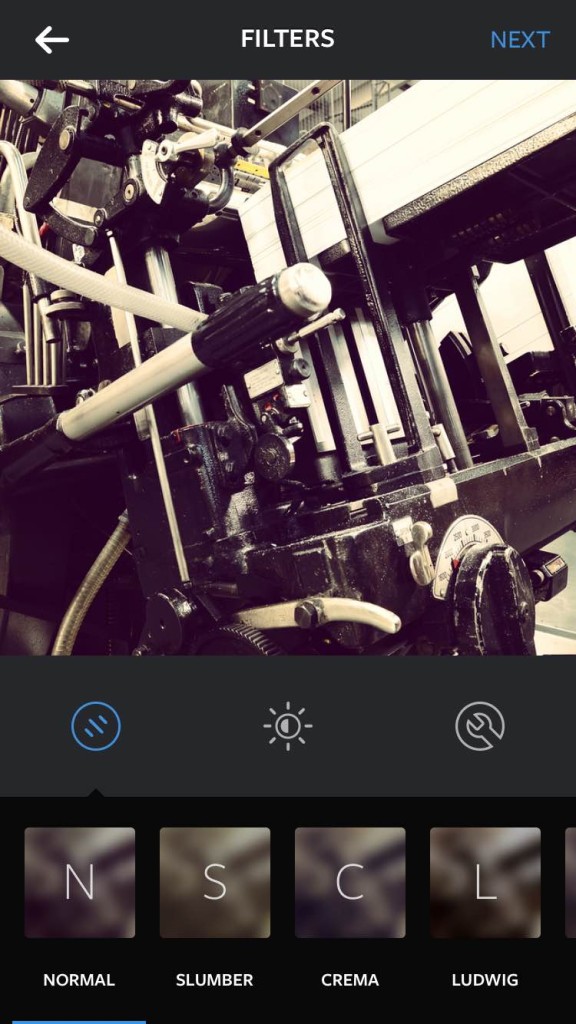
Once you have decided on a photo to upload, simply press the blue camera icon in the bottom centre of your Instagram home screen, and select the photo you wish to upload by pressing the square on the bottom left hand side of that screen. You should then be greeted with a screen that looks like this:
The three icons underneath your photograph allow you to select if you want to add a filter or adjust the brightness and other settings. The squares at the bottom with the odd words underneath them are your filters. Now, this is where the fun really starts…
Filters
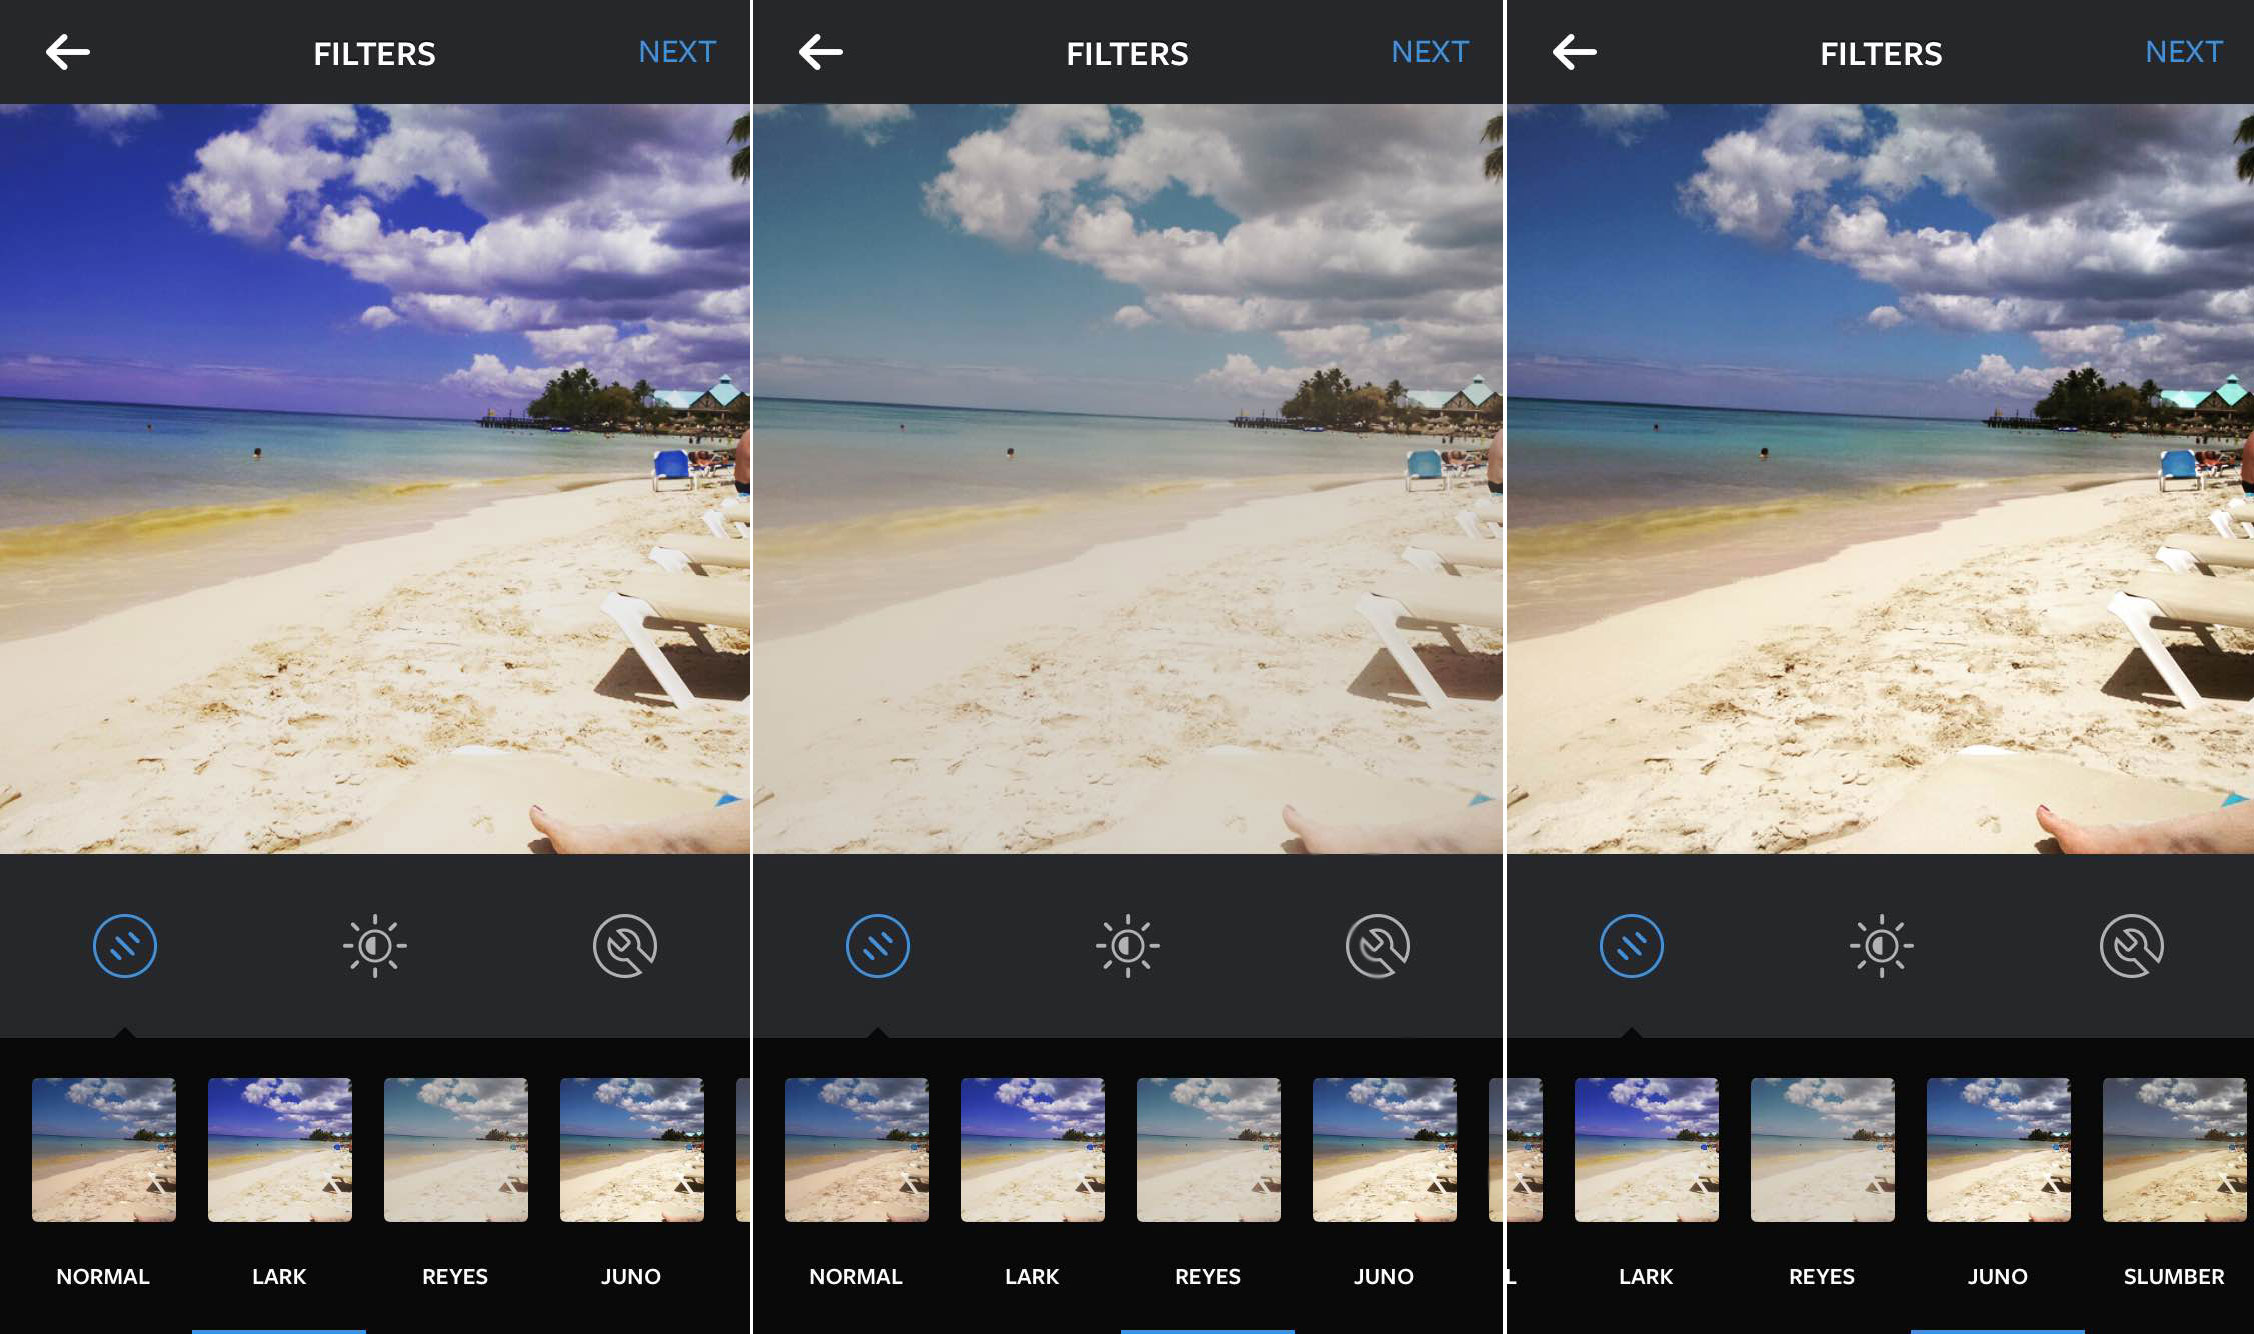
Being able to filter your photos is one of the main reasons that many social media users choose Instagram as their main photo sharing platform. Choosing the right filter can really enhance the features of your photograph, making it look effortlessly professional. Good news for you, on 12th May, Instagram introduced three brand new filters. Lark, Reyes and Juno are now available to use. On these screenshots taken directly from the Instagram app, the thin blue line at the bottom of the screen indicates which filter is being shown:
Lark: This filter desaturates reds and brighten blues, making it perfect for photographs of landscapes and scenery.
Reyes: A dusty filter that creates a vintage feel for your photographs. Great for photos of antiques or anything that would benefit from looking a little faded.
Juno: Brightens the entire image and increases contrast. A great choice for photographs of people.
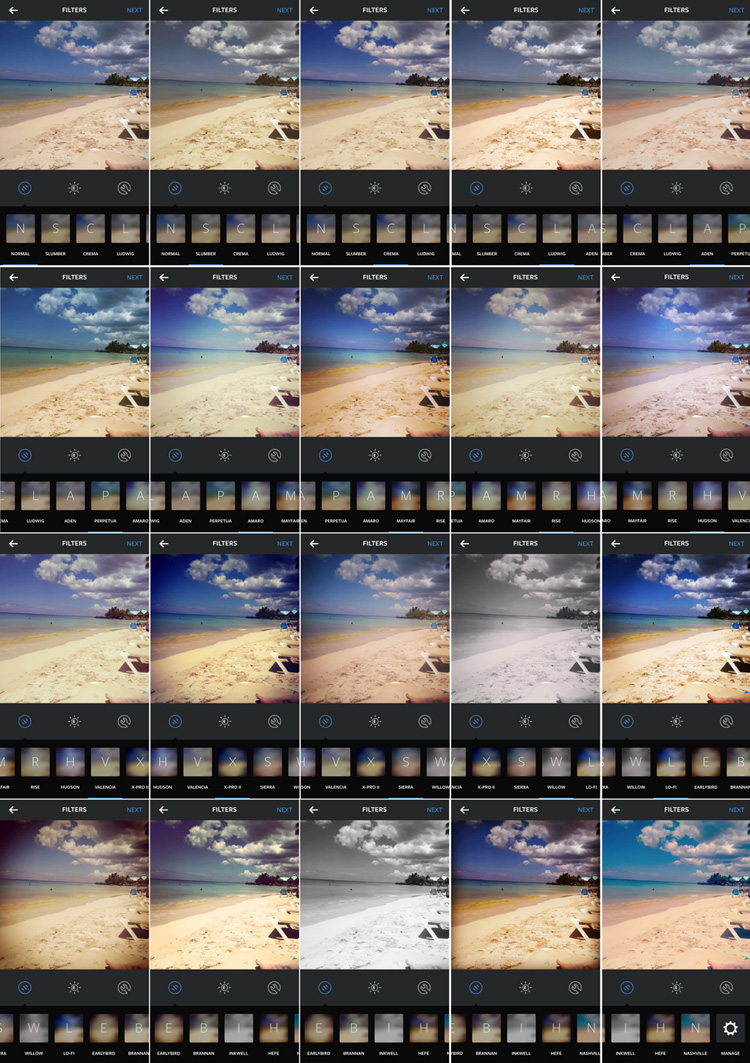
Worry not; however, Instagram still has all the old filters so you have a huge selection to choose from:
The choice of which filter you use for your photographs really is yours, it’s just a case of whichever one you think is the most effective. Different filters have different moods. For example, for a vibrant, happy photograph of a colourful bunch of flowers; a colour brightening filter such as X-pro II or Lo-fi is your best bet. However, if it is a more moody style that you are looking for then the creamy but sharp filters Crema and Brannan are bang on for creating those edgy photographs we all love.
Just in case you don’t trust yourself to choose your Instagram filter all on your own, here is a quick, honest and easy breakdown to help:
Normal/No filter: This one is exactly what it says on the tin. Allows you to simply upload your photo without filtering it. Surprisingly, this is the most popular ‘filter’ on Instagram.
Slumber: Introduced at the beginning of the year, Slumber is a warm filter that gives your photographs a honeyed, golden hue spread across them. It’s a great choice for warming up rainy days and creating a homely atmosphere in an otherwise dull world.
Crema: A slightly edgy, creamy filter. Great for landscapes. Even better for selfies (if you like that kind of thing).
Ludwig: This filter darkens colours whilst enhancing light, leaving you with a wonderfully dusky feel perfect for those shots that contain less activity.
Aden: A warm filter that makes everything look rather autumnal. Great for portrait and outside photographs, not much good for anything else.
Perpetua: An unusual filter that brings out blue and green tones. Great for photographs of metal-based scenes (for example, trains or computers).
Amaro: Adds a lot of light and slight exposure to your image. Basically the rule with this one is, the darker the image the higher chance that Amaro will have a positive effect.
Mayfair: The second most popular Instagram filter (after ‘normal’), it brightens the centre of the photograph and has a warm pink tone that looks great on warmer images.
Rise: Gives your photographs a yellowy tone and shows them in a more forgiving light. Great for portrait photos.
Hudson: A very cold filter that is not used very often. The only photographs that look half decent with this one are ones focusing on architecture. It just makes everything else look rather chilly.
Valencia: One of the most popular filters. Has a warm tone that softly brightens up your photographs. A great filter for beginners. If in doubt, use Valencia!
X-Pro II: Adds a juicy, pop-art style burst of colours to your photographs. Fantastic for any image that involves lots of colour.
Sierra: It’s low contrast and high exposure makes this filter add a daydream element to your photographs. However, use with caution as it can make photos look washed out if you’re not careful.
Willow: A black and white filter with a soft edge. Very forgiving as black and white hides a lot of flaws. Great for anything that isn’t quite camera ready, or creating an old-fashioned edge to your photograph.
Lo-Fi: Similar to X-Pro II, but even more extreme. Using this filter on your photographs can either make them look amazing or horrific. Use with caution.
Earlybird: A flattering filter with a hint of sepia, it’s no surprise that it is one of the most popular and celebrated filters on Instagram. Great for pretty much any photograph.
Brannan: A high contrast filter with a metallic base. Perfect for creating a bit of drama. Gives your photo a bit of a mood swing.
Inkwell: A no fuss black and white version of your original photograph.
Hefe: Very similar to Lo-fi and X-pro II, but with slightly less exposure. Great for warming up bright colours.
Nashville: A popular filter with high exposure that adds a pastel effect to your photos. Great for romantic, spring style photos. Perfect for pink flowers.
3. Hashtags
Ahh the hashtag. Used by many. Understood by… not as many. Lots of people don’t even know what they are. If you are one of those people then don’t worry! This guide is here to help you understand hashtags and soon you’ll wonder how you ever used social media without them.
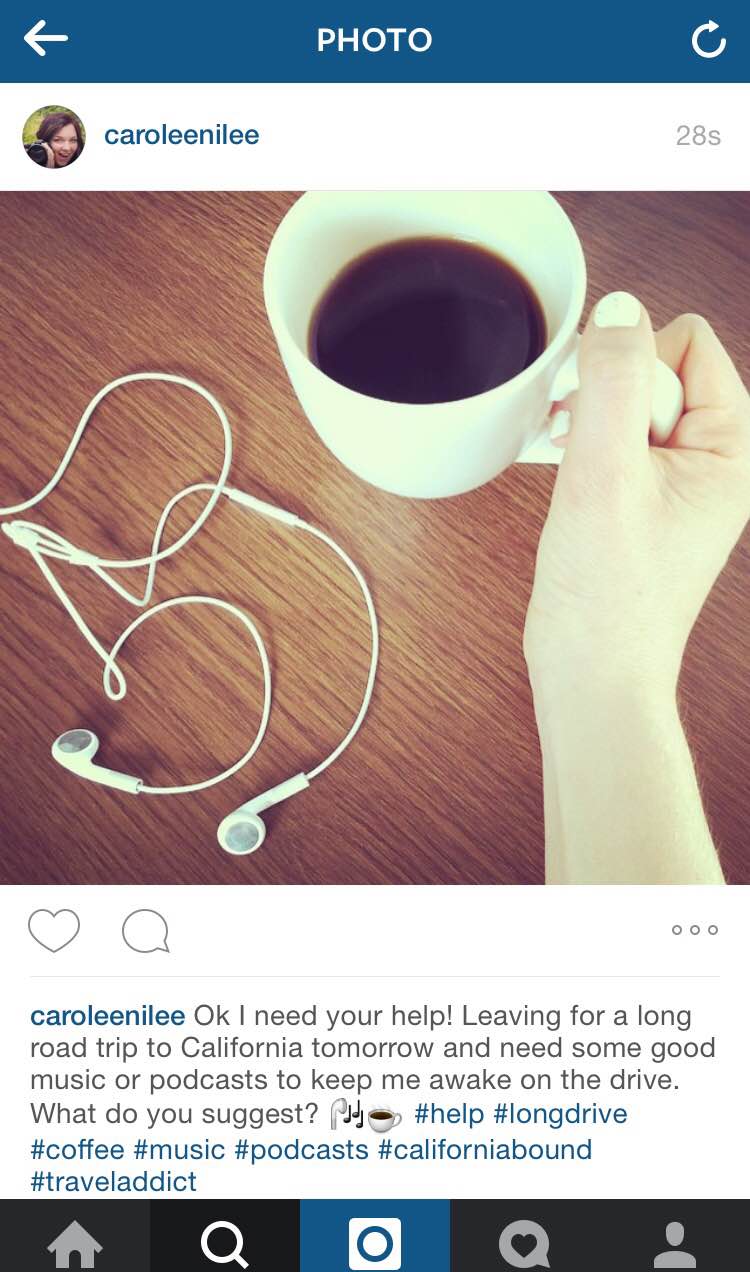
So, what is a hashtag? A hashtag is basically a word preceded with the hash symbol and is used to make it easier for users to find a piece of content that is related to a specific theme. For example, look at the hashtags that have been used on the photograph below:
As you can see, this user has used #californiabound in her caption. This means that anyone who has searched the #californiabound hashtag has a chance of seeing this post, which is great as the user is using the hashtag to ask advice from other travellers. If you were to click on the hashtag, you would see other posts that have used it, with the most recent ones at the top of the page, like this (you can see the above photo is the second of the top row):
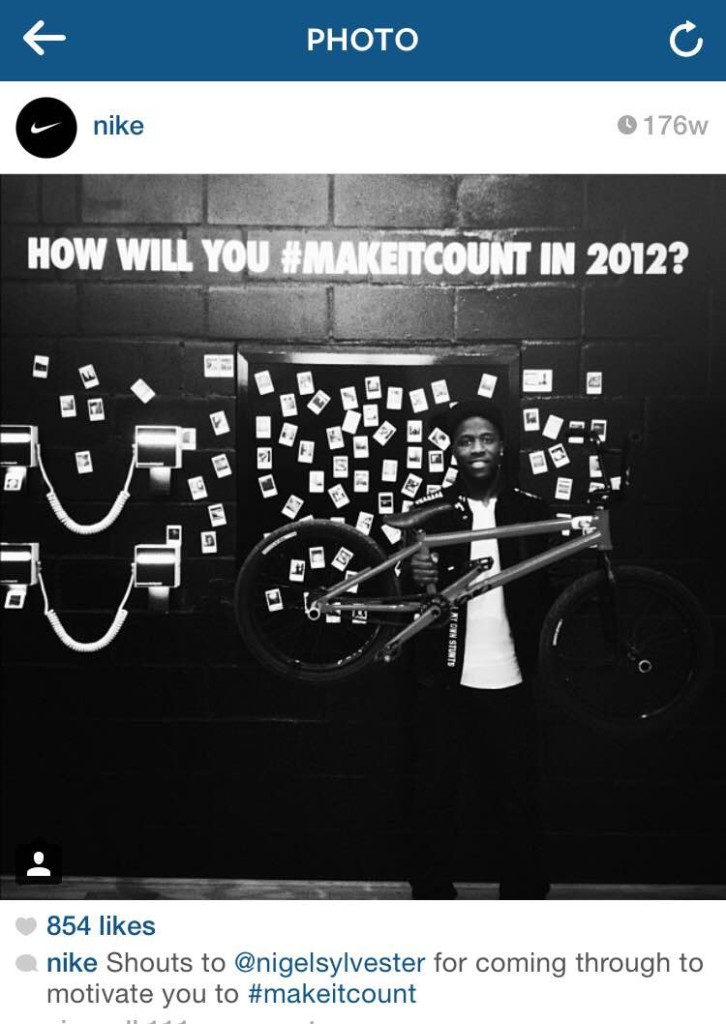
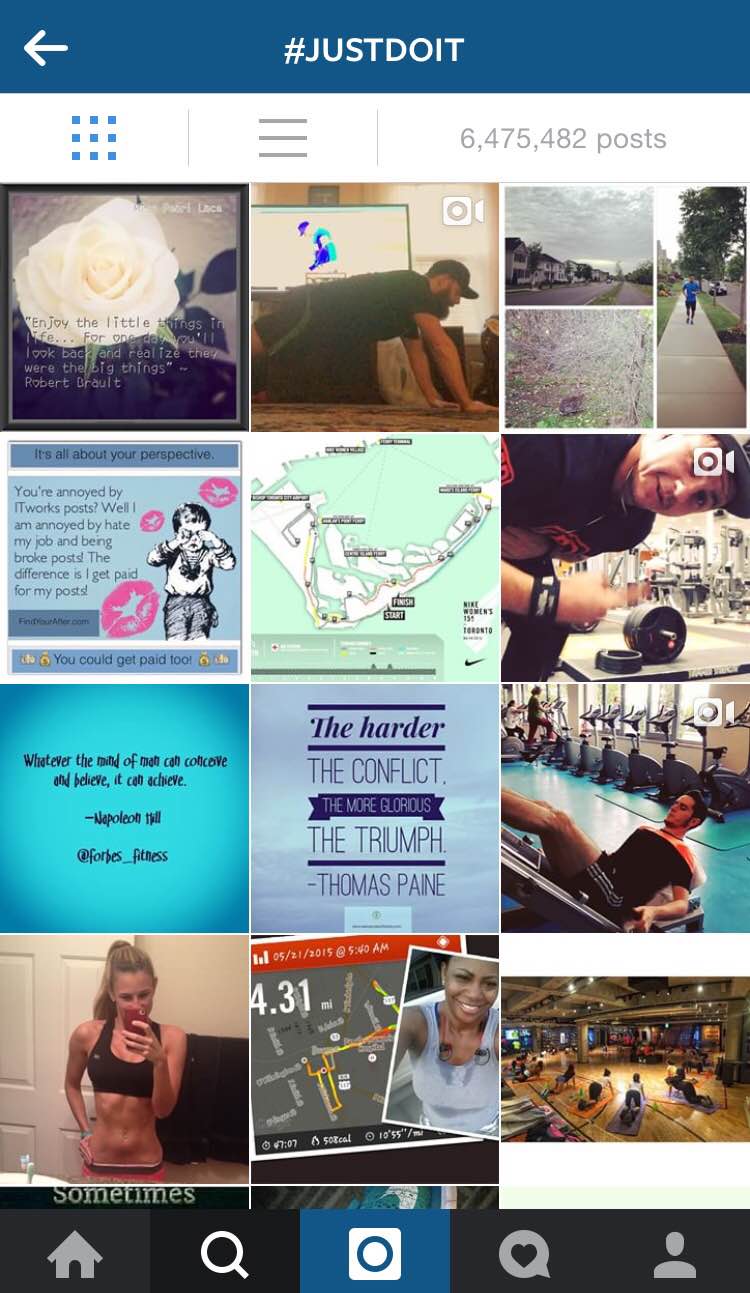
Many brands opt to create their own hashtags which become associated with them, such as #justdoit from Nike, which many Instagrammers use as a motivational community.
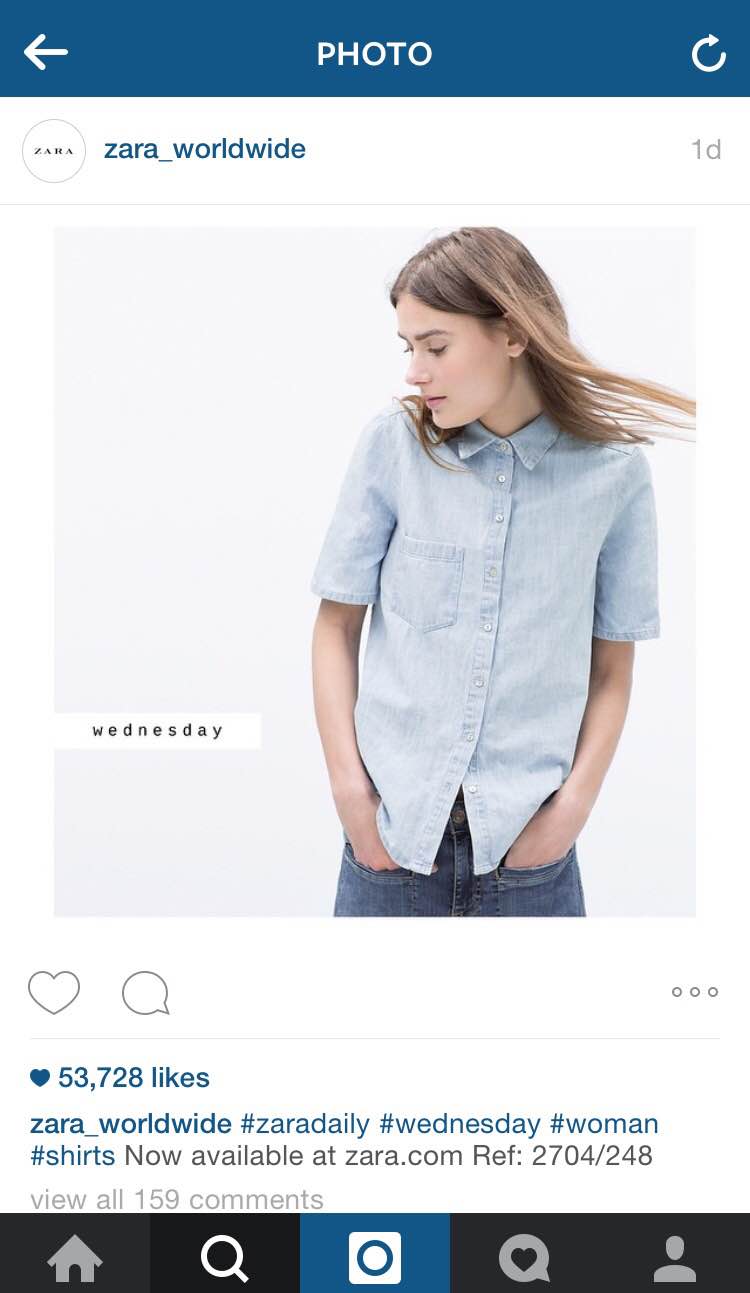
Other brands use hashtags in different ways. Popular clothing brand Zara uses #zaradaily to make their fashion-conscious followers aware of new items that are available. Motor company Ford uses the ever popular #ThrowbackThursday hashtag to create a sense of nostalgia for their car loving followers whilst also encouraging them to post photos of their own using the #FordTBT hashtag.
In case you’re curious, here is a list of some of the most popular hashtags on Instagram at the moment (taken from top-hashtags.com):
| #love | 893,829,534 posts |
| #instagood | 407,396,838 posts |
| #me | 366,849,334 posts |
| #tbt | 343,388,046 posts |
| #cute | 329,171,430 posts |
| #follow | 327,653,106 posts |
| #followme | 316,056,563 posts |
| #photooftheday | 309,735,074 posts |
Why not try and come up with some hashtags for your brand?
4. Engagement
So, you’re pretty much all set to start using Instagram to promote your business. Just one more thing: what is the most effective way to guarantee engagement from followers? Well, there’s no direct answer to this I’m afraid, but I can give you some helpful tips to help!
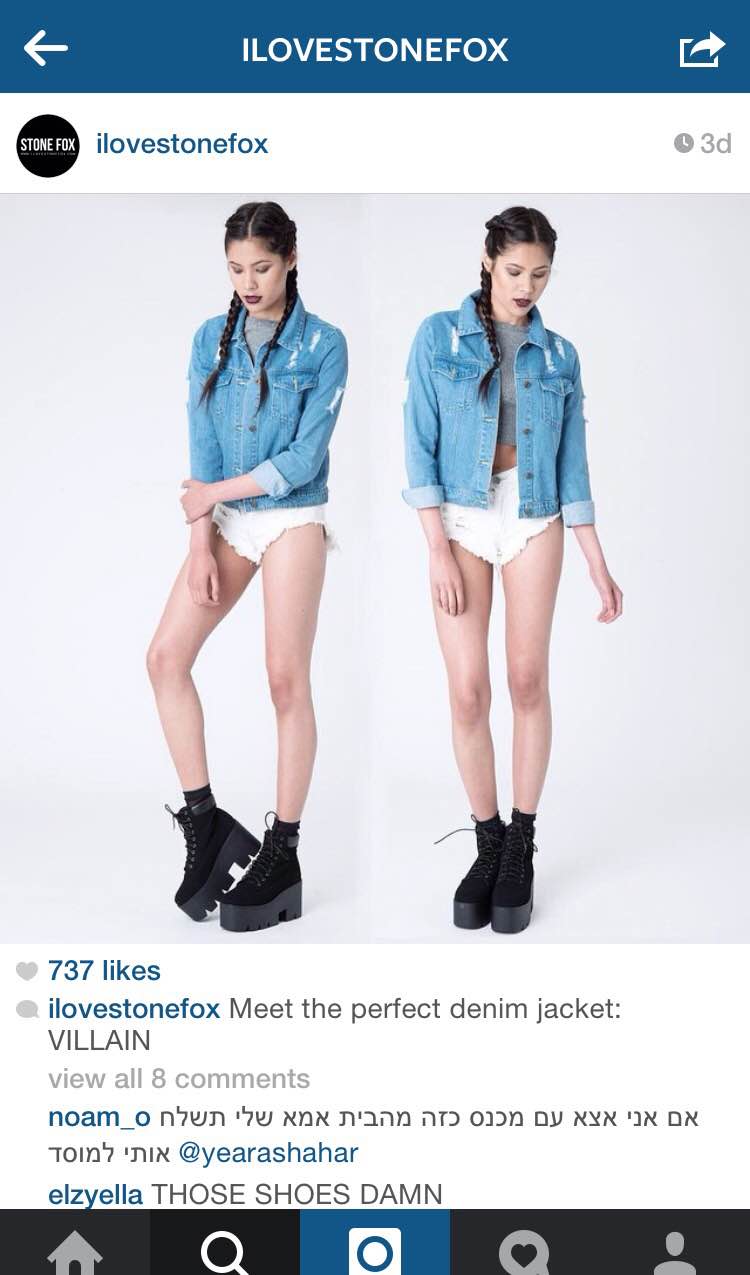
Introduce new products over Instagram. As you saw earlier with the #zaradaily hashtag, many brands choose to debut some or all of their products over Instagram, and for good reason! This is a particularly effective method that drives customer engagement as your followers feel that they are being given special treatment (and everyone loves to feel special!). Take the lead from fashion brand I love Stone Fox and give your followers that all important sneak peek!
Give your followers exclusive offers off your ecommerce products. Again, this makes your followers feel as though you are giving them special treatment. Plus, it will lead them directly to your online store so that they will spend their money on your products. Kaaaaching!
Interact with other Instagram users: Whether it’s your followers (you should definitely interact with them regularly) or people who use similar hashtags to your brand, interacting with other Instagram users on a regular basis is important to you creating a strong Insta-presence. So get liking and commenting, and watch your customer engagement soar!
5. Set yourself a target.
Well, actually, I’m going to set you one. Create your Instagram profile for your business and, using the information from this guide, upload four photos using relevant hashtags (or even one of your own!) and see if you can gain 20 quality followers. Happy Instagramming!
Look out for part 2: The Advanced Guide to Using Instagram for Business – Coming soon!


