All posts by Kath Payne

Thank you note

Why Personalised Thank You Cards Are Better than Shop-Bought

Who wouldn’t want to receive a thoughtful thank you card after giving someone a gift, or helping them out in some way? Nothing beats the kind gesture of letting people know that you appreciate what they’ve done for you.

Thank you cards are especially popular for events like weddings, birthdays and other gift-giving occasions. You might hand out thank you cards to all of your baby shower guests, for example. Or if you’ve recently been ill, you can use thank you cards to show appreciation to family members who have helped care for you.

You can use thank you cards to show gratitude to your employees for being loyal to your company. Some businesses even send thank you cards to people who apply for jobs, to let them know that you appreciate their time and effort.

But, what are the benefits of sending paper thank you cards? And why are personalised thank you cards so much better than shop-bought ones? Today, we’ll be answering these questions, and sharing a few handy hints for writing and sending the perfect thank you card.

Why Do You Need to Send Thank You Cards?

In the digital age, you may wonder whether there are any benefits of sending out traditional paper thank you cards over sending a thank you text or email. The answer is yes – and here’s why:

Make a Sincere Gesture

We’re living in a time when short and effortless “thank you” messages can easily be sent through text, messaging apps and email. But expressing your gratitude through a paper card that you’ve picked out, bought, signed by hand and posted makes the gesture more sincere.
This is because you’ve put real time and effort into showing the person that you appreciate them. A thank you card also conveys your emotions better than reading a message from a mobile phone screen.

Expressing Gratitude is Good for You

Don’t you just love the feeling of making someone happy with a thank you card? According to a study published in NeuroImage, expressing gratitude to those around you is actually good for you. Writing even short notes of thanks to those that you appreciate can bring benefits such as increased feelings of wellbeing, and reduced depression.

And the results last for a surprisingly long time, because gratitude is self-perpetuating. It means that the more you send thank you cards, the happier you’ll feel in general. Keep expressing gratitude and you’re more likely to notice all the little things in life that you can feel thankful for.

Continue an Important Tradition

Before there were mobile phones and laptops, people wrote almost everything they ever had to say in a letter. Although they take longer to arrive, the thought of having someone put in the time and effort to write has made letter- and card-writing an important part of human culture.

Author Florence Isaacs explains this best in her book Just a Note to Say: “When you write, there is no response to distract you from reaching within and exploring exactly what you feel and want to say. There is no mechanical equipment to act as a barrier.”

Why Should I Order Personalised Thank You Cards?

Now that you know the benefits of sending a thank you card to people who mean something to you, it’s also very important to know that there’s a difference between sending out a generic, shop-bought card that you’ve pulled off the shelf, and a personalised thank you card with your own message printed inside.

Personalised Thank You Cards are More Meaningful

Would you feel special if you received a clearly shop-bought card containing a generic message that’s been sent to 200 other people? Of course not. That’s exactly how your recipients would feel if you just bought a bunch of thank you cards with a standard printed message, signed your name and sent them out.

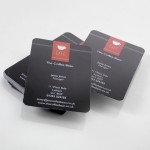
But by ordering your own personalised thank you cards, you can really send a meaningful message that will show your loved ones how important they are to you. You can edit the text inside to say something that comes directly from the heart, and even upload your own photo or image to the front. You can even create your own design entirely from scratch!

Personalised Thank You Cards Help You Stand Out

In a time when most people opt for the convenience of sending text messages with emojis to convey their emotions, you can set yourself apart and make a really good impression with a custom-made thank you card.
Sending a personalised thank you card will make sure that your message gets across and is noticed, unlike sending a generic shop-bought card that is indistinguishable from any other. This could be really beneficial if you’re trying to stand out – such as by sending a thank you note to a potential employer after a job interview.

Personalised Thank You Cards are Higher Quality

A thank you card isn’t the most expensive gift to give to someone. But when you add your personal touch to it and order a custom-made, professionally printed card, a simple gesture of gratitude can suddenly seem a lot grander – and will definitely be appreciated. Your recipients are likely to even keep your personalised thank you card as a memento for years to come!

All you need to do is browse from dozens of thank you card templates and choose the design that speaks to you the most. In a few minutes, you can edit the design to include a message in your own wording, and have it printed out and sent to you within days. And the best part is, you don’t need to spend a lot of money just to show people that you appreciate what they did for you.

How to Make Your Personalised Thank You Cards Extra Special

So, you now understand the importance of sending personalised thank you cards for anyone who’s gone above and beyond for you. Here are some important tips to remember when it comes to writing and sending them.

1) Consider the timing. When it comes to saying thank you to someone, you should aim to do it as soon as possible after the event (ideally, within a few weeks). This will give your receiver the impression that you really took the time and effort to acknowledge their kindness right away.

2) Keep your message simple. A lot of people forego the gesture of sending a thank you card just because they get hung up on what message to write on their personal notes. But the truth is, you don’t need to write a long, elaborate essay. Simple and sincere is still the best way to go when saying thank you.

3) Personalise each individual card. Underneath the printed message, add a custom message by hand tailored to the card’s recipient – for example, mentioning the specific gift they bought you.

4) Sign the card by hand. Even if you don’t have the neatest penmanship, always sign the card in your own handwriting if at all possible.

5) Add a few special details. While a thank you card with a personal note would suffice, you can always take things up a notch by adding a few extra details to your card. For instance, you can decorate the envelope to represent the personality of your receiver. If you have the budget, you can send flowers, a bottle of wine or an extra gift along with your card.

Try not to overthink things. What matters most is the act of showing your gratitude, and by sending a personalised thank you card you’re already achieving a lot.

Where Can I Order Personalised Thank You Cards?

These days when we’re all caught up in a world where everything is almost instant, it’s nice to lean on the old and established traditions that have kept our society running for hundreds of years.
One of these is by sending personalised thank you cards to people who mean most to us. While a thank you card isn’t expensive, the act of putting in the time and effort to show your appreciation is worth more than any fancy gift that you can buy in the shops.

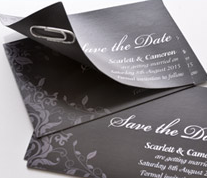
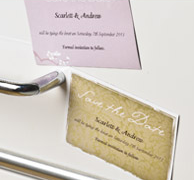
Simply head to 123Print today to browse our extensive range of thank you cards and choose the perfect template for you. We stock birthday thank you cards, landscape wedding thank you cards and portrait wedding thank you cards. You can also create your own card from a completely blank template, to really put your mark upon it!

All of our designs allow you to upload your own artwork, and edit the message inside to your heart’s content. Our designs are professionally printed, supplied with envelopes, and will be printed and dispatched within 48 working hours. What’s more, they are extremely affordable, starting at just £4.99 for 10. Why not stock up, so that you always have a card handy for the next time you want to show your appreciation to someone?

What to Put on a Wedding Save the Date (and What to Leave Out)

You’re keen to make your wedding day as perfect as possible. But now that you’ve begun the process of wedding planning, you’re starting to realise how overwhelming things can get, especially when it comes to all the details that you need to think about.

Having a save the date has become essential when getting married these days. Sent weeks or months before the formal invitation, the save the date will let your invitees know to keep the date free, and to expect an invitation in the future. This vital piece of stationery also gives you the opportunity to set the tone for your wedding, so they can look forward to what’s coming on your big day.

It’s essential to get it done right, because the save the date is the first impression your guests will have of your wedding. In this guide, we’ll talk you through what information needs to go on a save the date, and what you can leave out.

What Information Goes on a Wedding Save the Date?

When creating your wedding save the date, you need to remember one trick: “less is more.”
Since you’re sending out these cards at least six months before your wedding, you don’t need to give out too much information or details about the big day. At this early stage, you probably haven’t even finalised most aspects of your wedding yet anyway. You can save most of the little details for the wedding invitation, which you’ll send later on.

Here’s what you need to put on the save the date:
1) Your wedding date. This is, of course, the most important thing. Your guests will need to know which date to keep free in their calendars.
2) Who’s getting married. Don’t forget to include your names, so that your invitees know whose wedding it is!
3) Your wedding venue. You’ll need to book your venue before you can even think of sending out save the dates. You don’t want to tell everyone to keep March 10th free, only to find out that your venue is already booked up on that day!

Though the date and your names are the most important details, your guests will appreciate knowing the venue in advance. This is particularly true for destination weddings, or weddings held more than 1 hour away from where most of your guests live. This will give them extra time to plan their travel and accommodation.

If you’ve already created a wedding website at this stage, you can also include a link to it on your save the date. However, this isn’t strictly necessary, as long as it’s on the wedding invitation.

“Invitation to Follow”

As your wedding save the date could easily be mistaken for the actual invitation, it’s very important to put a note saying “invitation to follow” somewhere on the card.
This will let the guests know that this isn’t the invitation, and a formal invite will be sent out on a later date.

If you don’t include this detail, your guests may panic that they’ve missed some vital information about your big day – such as what time to arrive at the venue, where the reception will be held or the dress code.
A beautifully designed and professionally printed wedding save the date will get your guests excited for your upcoming nuptials, and give them time to plan their schedule so they can celebrate with you.

What About Destination Save the Dates?

Now, if you’re getting married in a foreign country, you also need to provide your guests with as much travel-related information as possible. This information would generally go on the wedding invitation, but for destination weddings, you want to give your invitees as much notice as you can.

For example:
1) The nearest airport
2) The best airlines and flights
3) What the weather will be like
4) Any vaccinations your guests will need to visit the country in question
5) The names of good hotels near your venue
6) Transit options to and from the airport

This way, you’re saving your guests a lot of time and effort. They can simply book their flights and hotels in advance without going through the hassles of figuring out the best options for their trip.
You should also ensure you send out your save the dates a lot earlier than you would for a domestic wedding (around a year in advance).

What NOT to Include on a Wedding Save the Date

Since your save the date isn’t your final wedding invitation, you can leave out the more intimate details – after all, you may not have even finalised them yet. For example, you don’t need to include:
1) The ceremony start time
2) The reception start time and/or end time
3) Accommodation or transport information
4) A map or directions to the venue
5) The dress code
6) Wedding breakfast menu or food choices
7) Where you’re registered for gifts

If you haven’t finalised the reception venue yet, it’s also okay to leave that information out. Since you’re still in the middle of wedding planning, you don’t need to be pressured into providing all of these details.
As long as you’ve mentioned that an invitation will follow, your guests will know to anticipate this information at a later date.

When Is the Right Time to Send a Wedding Save the Date?

Your save the date will serve as an advance notice for your wedding. So, as a general rule, you should send them out at least six to eight months before the big day, depending on whether your guests will need to travel.
This will give your guests enough time to block off their schedules, plan their budget and book their trip. Bear in mind that your guests may need a little more notice if they live far away.

You should send a wedding save the date to everyone you want at your wedding: family, friends, colleagues. Even if you’ve already told these people about your wedding in person, you still need to give them save the dates as proper courtesy.
Never send a save the date to someone if you’re not 100% sure whether you’re going to invite them or not.

More Top Tips for Writing Save the Dates

Now that we’ve sorted out the basics of a wedding save the date, here are some of the most important things that you need to remember when putting together your card:

1) Don’t include your registry information. Of course, your guests will want to know where you’re registered so they can start thinking about your wedding gift. But that information should be included on your wedding website, not your paper stationery. It’s considered tacky to include this detail on a save the date.
2) How many dates need to be saved? You’re giving out a “save the date” but it’s very important to be specific about the number of days you want the guests to save. For instance, you could say “save the weekend” if you’re planning any activities before or after the big day itself.
3) Forget the RSVP. Although it would be great to get a glimpse of your headcount early on, don’t send out RSVP cards with save the dates. Save these for your proper wedding invitation.
4) Decide on plus ones and kids. When addressing save the dates, you need to be decide how many people you want to invite from that household (including kids), and whether your guests can bring a guest of their own.

For instance, if the guest doesn’t get a plus one, then you only need to print one name on the save the date card. But if you want to invite the entire family, then you can go with “the Smith family” for example. And stay consistent – don’t change your mind between now and the formal invite.

What If You Need to Change the Date?

Now since you’re sending out these save the date cards early on in the wedding planning stage, it’s not out of the realm of possibility that some details about your wedding might change between now and the big day itself. For example, you might need to change your wedding date or venue.

If this happens, you have the option to send a “change the date” card providing the new details. You can use a regular save the date template for this, and simply alter the wording.
You can also post updates on your wedding website, so that guests can easily check in on them whenever they need to recall the details of your wedding.

Where Can I Order Wedding Save the Dates?

Save the date cards are a necessary part of wedding stationery that not only helps your guests plan, but also gets them excited for your upcoming wedding.
Follow these tips to make sure that you get your wedding save the date wording just right. But it’s equally important to choose a beautiful, appropriate save the date card design that will match your wedding theme.

123Print has a wide range of over 200 wedding save the date designs, so you’re bound to find one that matches your wedding aesthetic perfectly. You can choose between small, medium and large cards, or even vinyl magnets!

Ideally, choose a save the date which features the colour your bridesmaids will be dressed in. This hint at your colour scheme allows guests that aren’t in the wedding party to make appropriate attire choices.

When you’ve picked your favourite design, simply open up our editor to input your wedding details at the touch of a button. Your save the dates will be with you within days!

What to AVOID When You’re Designing a Business Card

Whether you’re just starting out in a new career path, have recently changed jobs, or have founded your own business, there are many reasons you might be thinking about designing a new business card. Perhaps you’ve just realised that your old business card needs a bit of a refresh.

Even if the digital age has transformed the way business connections are made these days, physical business cards are still effective tool for marketing and communication. But the problem is that not all business cards are alike. The way you design your business card, the information you put on it, and even which company you use to print it can have a huge effect on the impression it makes on others. And that, in turn, can have a knock-on effect on your success in the business world.

Today, we’re going to go over why it’s crucial to have a well-designed business card, the steps involved, and some of the most significant mistakes you should avoid making when designing one.

Why Is It Important to Have a Good Business Card?

One of the most common questions asked about business cards is: are they even still relevant in the modern age? Why is it important to have a physical business card when most professional communications and marketing can be done digitally? Well, here are some compelling reasons:

1) Business cards are an inexpensive way to promote your brand. Being made of paper, and able to be mass-printed for pennies, they won’t break the bank
2) They’re great for events and conferences. Handing over a business card is a quick and easy way to make that professional connection, without having to rattle off your e-mail address or phone number for the person to copy down
3) Business card are easy to display and to distribute, as they’re small enough to fit into the standard card pocket of a wallet
4) As business cards are a tactile object, they’re a physical reminder of the connection you’ve forged. An e-mail or website link is easy to misplace, but if someone’s got their business card in your pocket, they’ll find it again
5) Business cards help to spread your branding. You can include your logo, tagline, colour scheme and even special offers or product information.

But of course, a business card is only as good as its design. A boring, badly designed, unprofessional business card will be hard to read and may risk people taking you (and your company) less seriously. That’s why it’s vital to design a good business card that will draw the eye and make people want to get in touch.

How Do You Design Your Own Business Cards?

Business cards don’t have to cost the earth. While you can pay a designer to make your business cards for you, this can be quite expensive – and if you’re just starting out with your business, you may not have the funds available.

If you’re looking to save money, an easy way to do so is to use a professional stationery site, such as 123Print. You’ll be able to choose a template that speaks to you, and edit it yourself online – choosing your own wording, font colours and styles, and adding your own images. Your unique design will then be professionally printed to order, using high-quality cardstock.

The steps involved in designing your own business card are as follows:
1) Choose the shape and size. The traditional rectangular business card shape is the most universally loved, as it’s easy to fit into a wallet or business card holder. But business cards can also have vertical orientations, rounded corners, and other interesting design elements.
2) Choose the style and colour scheme. This would include the size, font, and colour of your card. The overall purpose of typography is to prioritise legibility over anything else.
3) Upload your logo and other graphics. The logo is the most important part, as it will instantly draw the eye and create brand awareness. You can also add other graphics and things like QR codes.
4) Add contact information. As well as your name and company name, you’ll need to include a phone number, e-mail address, and website URL. You can also include your physical premises address (if you have one), and other socials such as Facebook and Instagram.
5) Add a call to action or other details that will entice people to contact you – such as special offers, a discount code or even a loyalty card stamp section on the reverse.
This all may sound simple, but there are many traps people fall into – especially when designing a business card for the first time. Here’s what to avoid doing.

What to Avoid When Designing Your Business Card

These are several mistakes that you want to avoid when creating your own business card design. They are:

1. Not Using a Professional Stationer

Many new business owners are tempted to try making their own business cards. Unfortunately, this is never a good idea – unless you happen to have professional printing equipment on-hand.
Home-made business cards are difficult to get right. You might inadvertently cut off vital information in the margins, use poor quality paper or ink, or risk cutting them roughly or wonky. Home-made business cards always have a slightly slap-dash appearance which risks making you and your company look unprofessional.

2. Leaving Out Vital Contact Information

Needless to say, the contact information is the most important part of a business card. Your potential clients and contacts will need a way to reach you.
But don’t think that merely providing an e-mail address will do. Make sure to include a working telephone number, website address, and the physical address of your business (if applicable). And include your social media handles, too.
If you’ve recently changed phone numbers or acquired a new web domain, make sure you’re using up-to-date information rather than old contact details that won’t work.

3. Forgetting to Triple-Check for Mistakes

Grammatical errors, spelling mistakes and typos simply translate that you do not care enough about your business as a whole. And what’s worse, if the typo is in the phone number or e-mail address, it can actually prevent people from contacting you.
You can avoid this error by thoroughly double- and triple-checking every detail before sending your design to print. It’s always worth getting a second pair of eyes to take a look, too – as if you’ve been staring at a design for too long, you might miss something obvious.

4. Choosing the Wrong Font Style, Size or Colour

Choosing a font that’s hard-to-read will put people off, and may even prompt them to throw your business card straight in the wastepaper basket. Avoid using looping cursive fonts, too-small text, or a font colour that blends into the background.
Although you might be tempted to use a font colour that will match your business’s colour scheme, it’s vital that it will actually stand out in high contrast to the background colour. If your colour scheme is yellow, for example, this won’t be easy to read against a white card.

5. Using Harsh or Inappropriate Colour Schemes

Following on from the theme of colour, note that poor colour choices can ruin an otherwise decent business card design. Understand how colour schemes work together on paper and affect the design balance.
And while you might want your card to stand out, you must realise that different colours can create wildly different first impressions about your company. Making your business card pillar-box red might catch the eye, but it may cause people to associate your company with urgency, anger, or danger – not ideal if you run a relaxing spa, for example.

6. Not Including a Call to Action or Value Proposition

The value proposition – which is, essentially, a promise of the value your business is going to deliver – gives you a chance to make a connection with your readers. You may consider a brief summary of services you offer, for example.
And a call to action is equally important – something that you want the reader to do. It doesn’t need to (and shouldn’t) be long or rambling. A short phrase such as “call us today” or “check out our website” will still have an impact.

7. Leaving Out Essential Branding

Remember that your business card is a vital took for spreading your branding far and wide. Branding can help create general awareness of your company, and encourage people to choose your business over your competitors, purely due to familiarity.
So, it’s essential that you include your company logo, tagline, and any other essential parts of your branding right on the front of your business card. You’ll also need to coordinate the font and colour scheme on your card with what you’ve used on your website and other marketing materials.

8. Including Too Much Unnecessary Information

It is quite frustrating to look at a business card with lots of overwhelming information squished altogether. You’ve heard of the term “less is more” – and this is definitely the case with a business card. You only have a small area to work with. A business card isn’t the same thing as a flyer, where you’ve got more space to go into detail about what your business can offer.

Focus on the essential information (contact details, a brief indication of what you offer, and a call to action). You can always use the reverse of the business card for any extra details you might like to include.

9. Trying to Print Text or Graphics in the Margins

While designing your business card, remember that there will be a margin of space around the outside of the card where nothing will be printed. You may be tempted to spread your text right to the edges of the card in order to fit more in – but this would be a mistake, as there’s a genuine risk it may get cut off. Not only will the text be unreadable, but it will also make your business card look unprofessional.

When you’re choosing your business card template, pay close attention to where the sample text is aligned and use the dotted line as a guide to where the margin will be. Be sure to check the proof to make sure your text and images look OK before you send your design to print.

10. Not Ordering Enough Business Cards

The last thing to avoid when you’re designing your new business cards is not ordering enough. Particularly if you’re just starting out, you may be tempted to order the smallest amount of business cards possible to save money. But you will be genuinely surprised at how quickly you’ll go through them. It’s always better to order significantly more than you think you’ll need, so that you’ll have spares on hand at all times.

That way, you can keep some on your person, give them to employees to hand out, and of course keep a stock of cards in the shop or office. You can even include business cards in the packaging when you ship orders to encourage customers to shop again.
If you’re ready to start designing your perfect business cards, head over to 123Print. We have thousands of templates to choose from, and you can customise them all in seconds using our handy online editor. We’ll aim to print and dispatch your order within 48 working hours!

What Title Should You Put on Your Business Card?

Everyone knows how important it is to have a good business card on hand. Being the extension of your business or career, you need to make sure that you’re sharing the right information on your business card, and in a way that entices people to get in touch.

Along with your name and contact information, one of the most important details in your business card is your job title. Whoever’s reading your business card will need to know who you are, and how you’re related to the company you work for! But the question is, what title should you use?

If you’re an employee, this is pretty self-explanatory: it’s whatever job title is on your employment contract. If there isn’t one, or your role has changed since you were hired, you can always ask your manager or your boss what you should put as your role.

But if you own your business, or are self-employed, things aren’t quite as simple. Today, we’ll discuss what job title options you have for your business card, and how each one might affect people’s impressions of you.

What Are the Benefits of Having a Good Business Card?

Although most of the information sharing that we do nowadays is digital, the business card remains to be one of the best tools for promoting a business, a brand or a person. Here are some of the many benefits of having a business card:

1) It helps you create a good first impression. You don’t know when you’ll get the opportunity to introduce yourself to a potential client, business partner or employer. When that time comes, you need to be ready to create a good first impression and a business card allows you to do that.

2) It helps you build and expand your network. Whether you’re an employer or employee, it’s very important to grab every opportunity to build or expand your network. A simple business card is a great tool that will allow you to exchange contact information in a more formal way than sending an email or text.

3) It helps you create the right image. With a business card, you have complete control of the design and information that you’d like to share with people. This gives you the opportunity to create the image that you want people to see, and that helps you build yourself up for success – whether you’re applying for a job or trying to impress a client.

When someone has your business card, it’s easier for them to remember to reach out to you. But you’ve got to start things off on the right foot by thinking hard about your job title.

What Is the Right Job Title to Put on a Business Card?

Since a lot is riding on that small card that you’re giving away to people you want to connect with, it’s very important to know what job title you should put on your business card. This may sound simple, but a lot of people actually get this wrong. Here are some of your best options, and when it’s appropriate to use them:

President

This title strongly conveys authority, so you should only use it when you’re already an established entity. The term “President” can be interchanged with “CEO” and putting that on a business card means that you’re on one of the highest ranks in your office.
When choosing between the two options, it’s best to think about how you’d want your organisational structure to be as you grow your business, as well as your legal business entity.

CEO

Chief Executive Officer or CEO is a title that will instantly tell people that you’re in charge of your business. Most of the time, CEOs also own the company, so if you’re going to use this job title, you need to make sure that you’re already well established in the business and that you’re managing a big team of employees.

But if you’re just starting out as a business, it’s best to avoid using CEO in your business card, as this could convey that you want to pretend that your business is larger than it is, and that you’re a “big deal” – when you might not be quite yet!

Proprietor

This is the perfect job title to put on your business card if you’re just starting as a small business, especially if you’re in retail. Although “Proprietor” is an old term that refers to the owner of a small business, it’s still used a lot today because it conveys the right authority to someone who owns the business without sounding too cocky as compared to using CEO when it’s just a small company.

Owner

Nothing gets more straightforward than this job title. It’s more than appropriate if you’re a small business owner that hasn’t filed your organisational documents just yet.
The term “Owner” has lesser gravity than “CEO” or “President,” but it still gives people the (correct) impression that you’re an authority in your business as its owner. This option is also perfect if you’re a sole proprietor, or if you’re working with only a handful of employees.

Founder

Mark Zuckerberg, Jeff Bezos and Sir Richard Branson are just some of the many famous entrepreneurs who are called “Founders” by people within and outside their companies. A “Founder” is essentially the person who first started the business.
This title is used a lot these days, especially in the tech industry where there are a lot of start-ups that grow to become bigger companies within just a few months. However, you should definitely avoid using “Founder” if you took over an established business or you simply own shares in it. This would be disingenuous.

Administrator

The term “Administrator” conveys both authority and responsibility in the business. When you put “Administrator” on your business card, you’re telling people that you have authority in the organisation, but you also take care of core responsibilities that help with your day-to-day operations.

However, this may confuse people if you’re the owner as well, as someone can work as an administrator of a company without actually owning it. It’s a great option, though, if you don’t want to intimidate people and you want to emphasise the work that you actually do day-to-day.

Director

If you want to be more specific about the role you play in the business, but you still want to convey a sense of authority, you can choose a more descriptive job title such as Managing Director, Creative Director or Technical Director. Some professionals also write it as Director of Operations or Director of Production.
Again, this role emphasises that you have a senior role in the company, but conveys slightly more information about the day-to-day duties that you oversee.

Managing Partner

You could own a business and not necessarily hold a core position within its organisation. This is when you can use the title “Managing Partner” or “Managing Member” that conveys that you’re still involved with the decision-making part of your business, although you’re leaving the operations to people you hired to be part of your team.

So, Which Title Should I Choose for My Business Cards?

The great thing about choosing a title to put on your business card is that you can be as creative as you want, except when you’ve been given a job title by your employer. Make sure to consider different factors before choosing the right label.
Remember that people place a lot of weight on the information written on a business card, so it only makes sense that you use the job title that will allow you to set good first impressions.

Whether you choose to go bold with CEO or subtle with Proprietor, remember that you have to back it up with credibility and experience.
If you’re ready to start designing your very own business cards, a great place to begin is 123Print. Feel free to browse through our huge range of business card templates for some inspiration: we stock designs for a great number of vocations and niches, from solicitors to dog groomers.

When you’ve chosen your favourite design, our easy editor will allow you to upload images (such as your company’s logo), add your personal details, and change the font colour and style to your liking. Alternatively, if nothing feels quite right, start with a blank template and create your own design entirely from scratch!

Your business cards will be professionally printed to order in your chosen quantities, and dispatched to you within 48 working hours. And if for any reason you’re not happy with the way your cards turn out, we’ll replace your order until you are, free of charge. Take the first steps to business success today with 123Print!